FILM & FLATS
Microtek ScanMaker i900 --
Best of Both Worlds
Editor
The Imaging Resource Digital Photography Newsletter
Review Date: April 2004
We had planned to squirrel away the winter scanning a few hundred old slides. Since we had already discussed using your digicam to copy slides, we wanted to use a film scanner this time. Just how feasible would it be to scan a bunch of old slides with a film scanner?
We hit a snag right out of the box. Our film scanner was a 35mm scanner.
All of our old slides were in 35mm mounts but they weren't all 35mm frame size. Some of them were almost as large as the mount. And some were smaller squarish sizes. It's amazing what mankind has managed throughout history to fit in a 35mm mount.
So we resorted to a flatbed. Not just any flatbed, though. We've scanned transparencies on a flatbed before. We got great results from an expensive Agfa Dual years ago and miserable results from an inexpensive Umax with a transparency adapter.
This time we went for a pretty interesting product from Microtek (http://www.microtekusa.com), the ScanMaker i900. It featured the same dual bed design of the old Agfa and, at $599.99 list (minus a $50 rebate coupon at http://www.microtekusa.com/images/rebatei900.pdf), was closer in price to the Umax. Most importantly, it really didn't care how big a transparency we wanted to scan.
Of course, there are a few other attributes it needed to qualify. Take a look at Kim Brady's Guide to Desktop Scanners (http://www.imaging-resource.com/ARTS/SCANG/SCANG.HTM) from our Sept. 21, 2001 issue for more detail on the following important features.
Inexpensive flatbeds usually boast something as low as 1200-dpi optical resolution (although the trend is upward). If you scan a 35mm film frame at that resolution, your maximum enlargement for a 300-dpi dye sub printer is 4x6. To get an 8x10, you have to be able to scan 2400 dpi (and some people think math isn't our thing). So the low number of the scanner's optical resolution had to be a least 2400. The i900 has 6400x3200 dpi optical, so at 3200 it qualified.
In fact, 2400 dpi is the current limit for 8.5-inch wide flatbeds. Manufacturers achieve resolutions greater than that by stacking CCDs at a half-pixel offset. For the i900, Microtek uses two 1600-dpi CCDs to get to 3200 dpi.
In olden days, the only way to copy a slide was to dupe it. And duping always results in a loss of quality. Typically, detail is lost in both the highlights and shadows, increasing contrast. Naturally, we had about 100 dupes to scan. Precious dupes but dupes. We needed a scanner that could capture as much detail as remained in those dupes, above those high 3.x maximum optical density figures you see on most flatbeds. The i900 has 4.2.
Unlike digicams, most scanners (even inexpensive ones) capture more than eight bits per channel. Eleven, 12, even 14 bits are common, but the i900 captures a full 16 bits. This gives you quite a bit more information to work with.
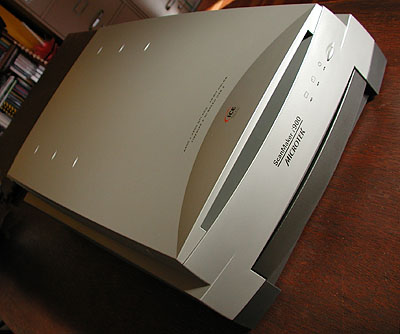 |
| The ScanMaker i900 |
Finally, we knew we'd be scanning some large files, so we wanted a fast connection. The i900 has both Hi-Speed USB 2 and FireWire ports. We set up the FireWire connection.
With the i900 we got a little more than we bargained for. Because it's a flatbed, it can batch scan up to 12 35mm slides or negatives at a time. At 77 megabytes each, that's probably enough for one batch.
Finally, there are a couple of software items that speak to quality. The inclusion of SilverFast Ai impressed us. Even more, the inclusion of IT8 reflective and transparent targets (with the associated data files on CD).
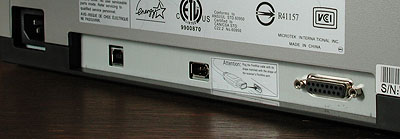 |
| The Ports Power, USB 2.0, FireWire and accessory ports |
More companies should supply IT8 targets with their scanners. If not, you have to buy these tools to actually calibrate your scanner. By including them, Microtek makes a statement. And the statement is simply, "Quality."
THE COMPANY | Back to Contents
Quality is no stranger to Microtek. The company claims a number of industry firsts from the world's first 300-dpi black-and-white sheetfed scanner in 1985 to the world's first USB and SCSI scanner in 1999. With over 100 patents worldwide, Microtek dedicates over 20 percent of its staff and over 10 percent of its revenue to research and development.
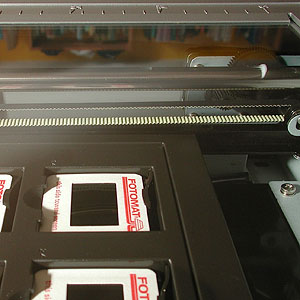 |
| Looking through the Glass Film is scanned with no glass (or dust) |
Founded in 1980, the company is headquartered in Industry Park in Hsinchu, Taiwan. The company has major operations and distribution channels in 53 countries around the world. In the United States, Microtek is located in Carson, Calif.
The full specs for the i900 follow:
- Photo reconstruction via built-in Digital ICE Photo Print technology
- Photo restoration via ColorRescue color restoration for photos and film
- 6400x3200-dpi optical resolution
- 48-bit color bit depth
- 4.2 maximum optical density
- 24,480-element Sigma Six CCD image sensor using a dual tri-linear array
- 8.5x14 reflective and 8x10 transparent scan areas
- Six-pin FireWire/IEEE-1394 and Hi-Speed USB interfaces
- 7 second full-bed preview scan time
- Single color pass; two passes required for Digital ICE
- 120V-220V, 50-60Hz voltage with 36.5W power consumption
- Bottom screw chassis lock
- 23.6x15.2x6.3 dimensions, weighing 24.7 lbs. (44.2 lbs. shipping)
IN THE BOX | Back to Contents
Included in the box are all the cables you need (power, USB and FireWire) and a set of SnapTrans templates. SnapTrans templates are plastic inserts the size of a sheet of paper that let you mount multiple filmstrips, slides or transparencies with little more than a snap. The loaded templates fit into an opening in the lower, main staging tray so the film can be scanned with no glass between the sensor and the film (like film scanners and unlike flatbeds with transparency adapters). The included set contains templates for 35mm mounted slides, 35mm filmstrips, 6x9cm film, 4x5 film. Also included is an 8x10 glass film holder assembly to handle larger transparencies. A set of 10 vinyl strips for the glass holder is also included.
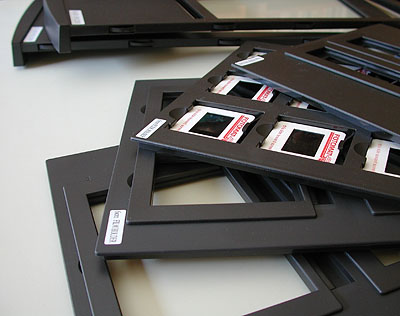 |
| SnapTrans Templates With template and glass trays behind them |
Both a reflective and transparent IT8 target are included.
Macintosh software for OS 9 includes Microtek ScanWizard Pro, Microtek Scanner ICC Profiler, Color Matching System, ABBYY FineReader, Ulead PhotoExplorer, Adobe Acrobat Reader. OS X software includes Microtek ScanWizard Pro, Microtek Scanner ICC Profiler, Acrobat Reader. Windows software includes Microtek ScanWizard Pro, Microtek Scanner ICC Profiler, Color Matching System, ABBYY FineReader, Ulead PhotoExplorer and Adobe Acrobat Reader.
Included for all three platforms is Photoshop Elements 2.0 and SilverFast Ai.
We also tried Ed Hamrick's VueScan with the i900, scanning reflective and transparent materials and doing OCR with the latest version. The i900 is fully supported.
Support by email or through the Web site is free. Microtek offers one year of complimentary installation support and fee-based advanced troubleshooting, support and consulting through the MLI Consulting Group. The unit includes a one-year limited warranty.
SYSTEM REQUIREMENTS | Back to Contents
Macintosh system requirements are 128-MB RAM (256-MB to use Digital ICE), G3-G5 processor with built-in USB or FireWire port, OS X 10.2 or later.
Windows system requirements are 128-MB RAM (256-MB to use Digital ICE), Pentium III processor, USB or IEEE-1394 port, Windows 98SE/ME/2000/XP.
INSTALLATION | Back to Contents
We installed the i900 twice. Hoisting this behemoth around is not for everyone. At roughly 25 wide-bodied pounds, it's awkward to pull out of the box and hard to lift. Enlist an associate.
That, of course, only speaks to the quality of its construction. It's built like a tank. Considering the sensitive optics, that's a good thing.
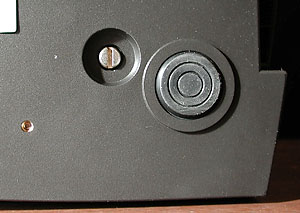 |
| The Lock It's the small screw in the well |
Once positioned, you have to unlock the chassis (as with any flatbed). A screw on the bottom can be rotated with a coin or screwdriver. To unlock the chassis, turn the screw counterclockwise until it pops free. It will extend slightly below the bottom of the scanner when unlocked. Lock the chassis before moving the scanner by pushing the screw in and turning clockwise until it's snug.
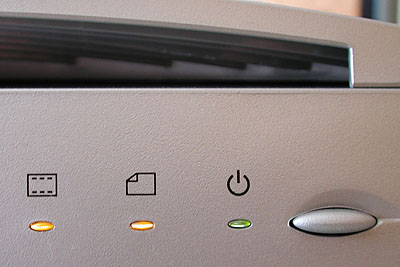 |
| The Power Button And three status lights |
Connect the cable of your choice to the appropriate port on your computer and you're almost ready to go. You should really install the software before powering it on so your computer knows what is being plugged into it.
Software installs are a lot less painful than they used to be and we have no pain to report in this case. We installed both SilverFast Ai and Microtek's ScanWizard Pro. We had already installed VueScan.
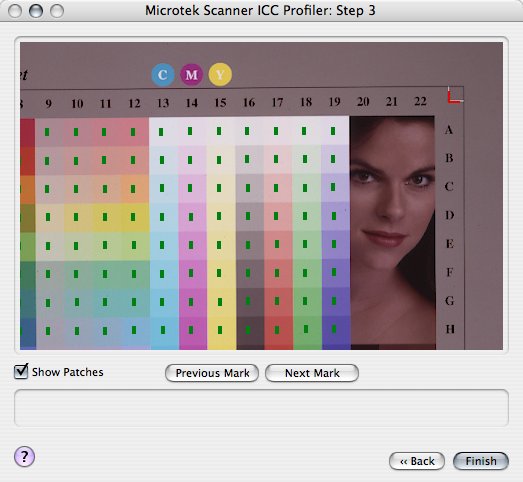 |
| The Profiler Every program does it differently, but this was easy to align. |
Every one of these three programs knows about ICC profiles and wants one for the reflective bed and another the transparency tray of the i900. ScanWizard Pro actually insists you calibrate and profile the scanner. That's really the last step and all these programs make it easy (if you read the documentation). We can't applaud Microtek enough for including the IT8 targets you need to actually do this. It's the last step to the installation.
PUTTING IT TO THE TEST | Back to Contents
Over several weeks, we scanned a variety of material, starting with some 90+ year old black-and-white prints from Germany. Then we scanned some 35mm Tri-X negatives we'd developed ourselves. Color negatives developed at one-hour kiosks were not far behind. Then we scanned a reference set of 35mm slide images with a good deal of contrast and saturated color.
We were impressed with the quality the i900 delivered in each case. The 4.2 DMax delivered excellent shadow detail and the 3200-dpi optical resolution delivered sharp detail. Our notes from scanning each of the various materials follow.
Reflective art. No special template is required to scan reflective material like photos. You simply position the material upside down (so the scanner can see it) with the top near the front, just as you would with a photocopier. The 8.5x14-inch glass is bordered by markings in inches and centimeters. A flat black background is attached to the hood of the scanner.
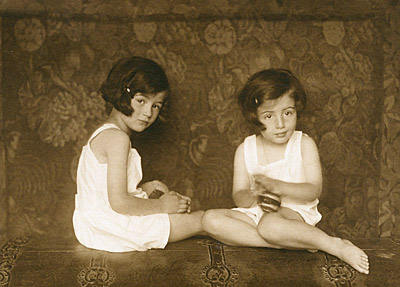 |
| Berlin Portrait Reflective art scanned quickly with great quality |
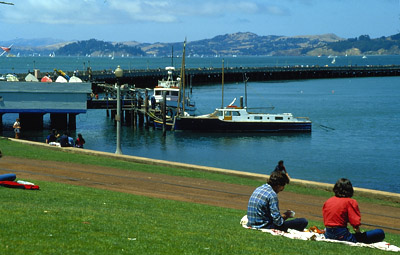
35mm color slides. The SnapTrans template for slides is, well, a snap to use. You can load 12 at a time in individually numbered windows. The slides are held securely in place by flexible plastic springs. As with everything scanned from the bottom tray, the film should be loaded with the emulsion up, wrong reading. And, as with everything on this scanner, the head should be toward the front.
 |
||
| Slide Scanning Here's the whole image, from the i900 scan |
||
 |
 |
|
| i900 Full pixel crop |
Elite 5400 II Full pixel crop |
|
| So what's going on here? The Konica Minolta DiMAGE Scan Elite 5400 II is a top-of-the-line 35mm film scanner with a 4.8 DMax. We scanned the same image at 3200 dpi on both scanners and present a 100 percent pixel view here. This is so small, you'll have to work hard to find the crop in the full scan above. There is a difference, but this flatbed knows how to impersonate a dedicated film scanner. | ||
Scanning 35mm film format as 16-bit channels at 3200-dpi yielded 77-MB files that captured detail in the darkest areas as well as the highlights. Reduced to 8-bit channels, they were 38.8-MB files.
At 3200 dpi, you get enough data to resize (without resampling) for printing at 300 dpi. That yields a 10.1x14.9 image. Which is more than we felt we needed to make 13x19 prints on the Canon i9900 or the Epson 2200.
We examined our originals on the light table with a 10x loupe. Everything we saw there, we found in the scan. Shadows, however, were noisier than scans from a film scanner.
Slides are clearly the most demanding material to scan. They're small, so they challenge a scanner's optical resolution. And they have the densest shadow detail, challenging, requiring a high DMax to distinguish detail there. In both cases, the i900 was up to the challenge. These slide scans were nearly as good as any we've done on a dedicated film scanner.
35mm negatives. The SnapTrans template for 35mm filmstrips, which takes two individually numbered strips of up to six frames each, is the trickiest of the set. The hinge, at the narrow end, slides to be able to align the individual frames to the plastic frame partitions for each strip.
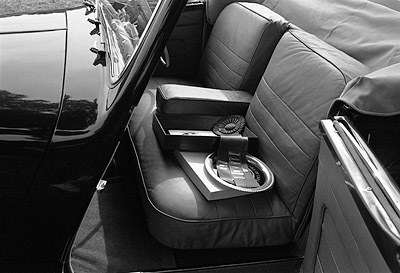 |
| 1949 Triumph Right, the steering wheel is on the left. Plus-X neg. |
So you open the plastic lid for each strip, drop your strip into the holder, line up the first bank area between frames with an arrow on the holder (which is not the final alignment) and close the lid until it snaps. As it closes, it slides the film strip into what should be the correct alignment in frame partitions, but we found we had to slide the lid back and forth a bit to match up. That's why the hinge slides, after all.
Different cameras will advance the film differently and the developing and drying process shrinks each roll differently, too. So don't expect all frames to line up perfectly. Why does Microtek put those little plastic partitions in the template, then? They help you put the image where the scanner software expects it to appear. If you need more precision, of course, you can always use the glass holder.
On one occasion we ran into trouble with this template. A handcut strip of film slipped below the holder and sliding the lid back only smacked the film edge against the side of the frame partition, preventing the lid from moving back into the holder so it could be raised. Our film was locked into the holder. We resolved this by carefully prodding the film back into the holder from the bottom, touching only the base with a gloved hand.
Negatives play a trick on DMax. The scanner's ability to distinguish tones in the shadows become its ability to distinguish tones in the highlights when you scan negatives. Given the wide latitude of negative film in general, compared with slide film in particular, this presents an interesting challenge to any scanner.
The i900's 16-bit channel capture is a boon for this, though. It may seem like overkill to capture 16-bit channels of what is typically a snapshot, but the reward is a much finer image than was ever squeezed out of that film before. This is particularly true of poorly exposed negatives whose prints from the one-hour machine disappointed you years ago. The i900 can bring them to life.
Converting color negatives to positive is a black art. We discussed it at length in two Advanced articles, explaining what the orange mask does and the proper way to account for it. Fortunately, Microtek's two software solutions both include advanced negative conversion modules that, if nothing else, are excellent starting points. SilverFast Ai includes NegaFix and ScanWizard Pro has a similar feature, as does VueScan.
RESTORING PHOTOS | Back to Contents
In fact, just as Microtek engineered the hardware with no holds barred, the included software has every tool you need to do some otherwise hard work. We've mentioned the negative conversion tools. But let's look at the restoration tools.
 |
 |
| Before A real rip |
After A bit too aggressive |
There are two types of damage that occur to prints. One is color fading and the other is physical damage to the emulsion caused by folds, scratches and tears.
Microtek's ScanWizard Pro addresses both with its PictuRescue system. PictuRescue combines the color restoration technology of Microtek's ColoResue with Digital ICE's infrared defect masking and repair. SilverFast Ai has its own tools to address these issues (see our SilverFast review http://www.imaging-resource.com/SOFT/SF6/SF6.HTM).
Using these corrections is straightforward. In the Scan window, do a Prescan and select only the image area (no border or background). In the Settings window, just select the level of Digital ICE to use (Normal, Strong) to fix physical damage. To automatically restore color, just click the Automatic Color Restoration checkbox.
Digital ICE requires two passes over the image and more RAM. It scans the image in an infrared pass that maps the image defects and scans it for its visual properties. Adding RAM can help processing speed, but it's an inherently longer process. Note, also that this approach is not for film or halftoned images.
We've been meticulously restoring the odd but precious antique image for a long time now. It's demanding work, even with something as sophisticated as Adobe's Healing Brush. It ranges from simple scratch removal to the reconstruction of facial features. It also ranges from duplicating meaningful patterns to filling in fuzzy background features. No mere software algorithm is going to have the intelligence to handle the full range of repairs.
So don't expect miracles when repairing physical defects like tears. You can do better in about as much time using the Healing Brush or a clone tool. But automatic color restoration is a huge time saver. It can be very difficult to find the sweet spot without a tool like this.
QUIBBLE METER | Back to Contents
Just a couple of quibbles. Behavior became unreliable scanning within Photoshop with 512-MB RAM and 7-GB free disk space. Running either ScanWizard or SilverFast without Photoshop loaded worked better.
You can get the job done with any of these programs but it could be a more pleasant experience. We're comfortable with VueScan and SilverFast. We knew what to look for in ScanWizard, but its selection of film types leaves a lot to be desired.
So prepare yourself for a little software frustration. Especially if this is new to you.
Looking for a scanner that can handle film as well as flats is like looking for a camcorder that can take great stills. If you ever did find one, no one would believe you. They really address different problems.
But the i900 attacks the problem with a large dual bed design, adequate optical resolution precisely controlled for multiple scans and a high DMax to capture shadow detail. And Microtek supplies the IT8 targets you need to calibrate it.
Our tests showed that whether we ran it from ScanWizard Pro, SilverFast Ai or VueScan, we were able to get excellent results with both flats and film (positive and negative). We're starting to wonder about that dual-purpose camcorder and even the Fountain of Youth.